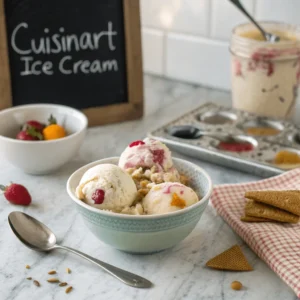
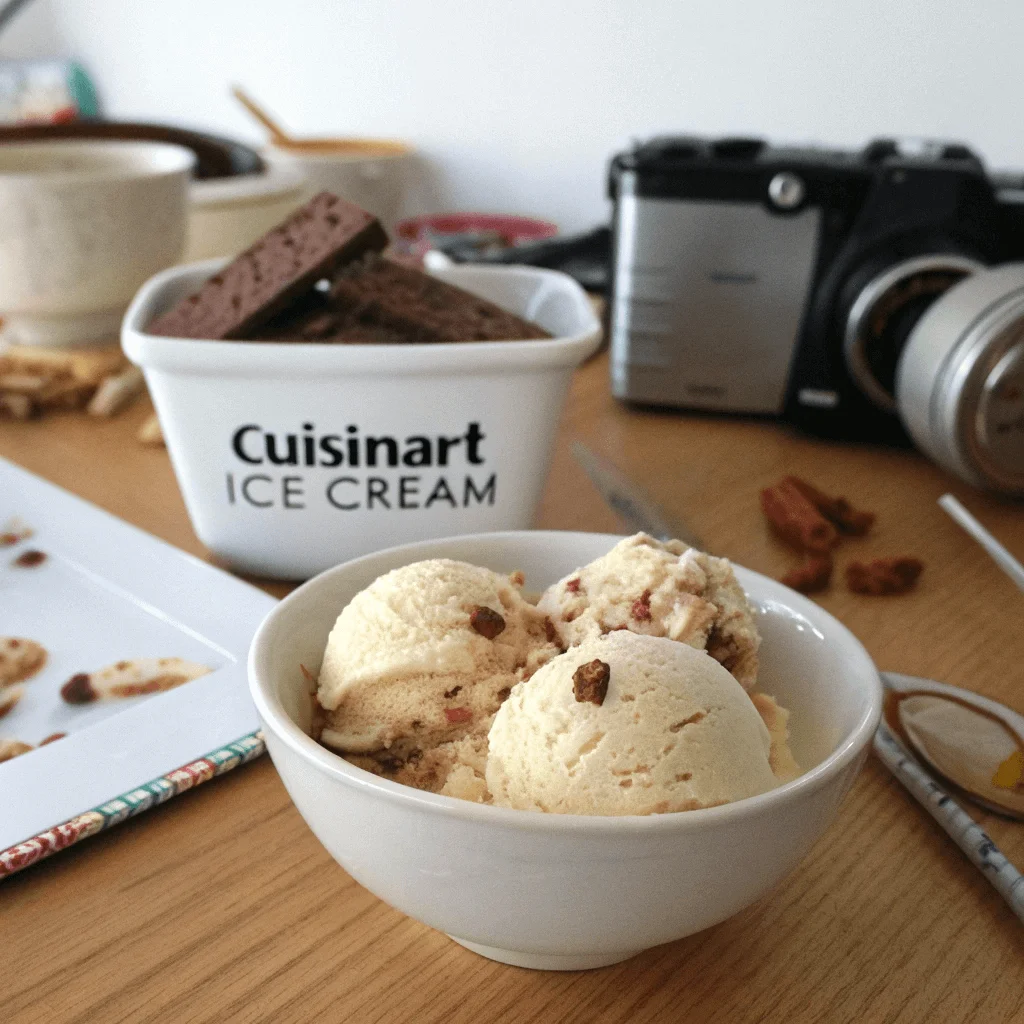
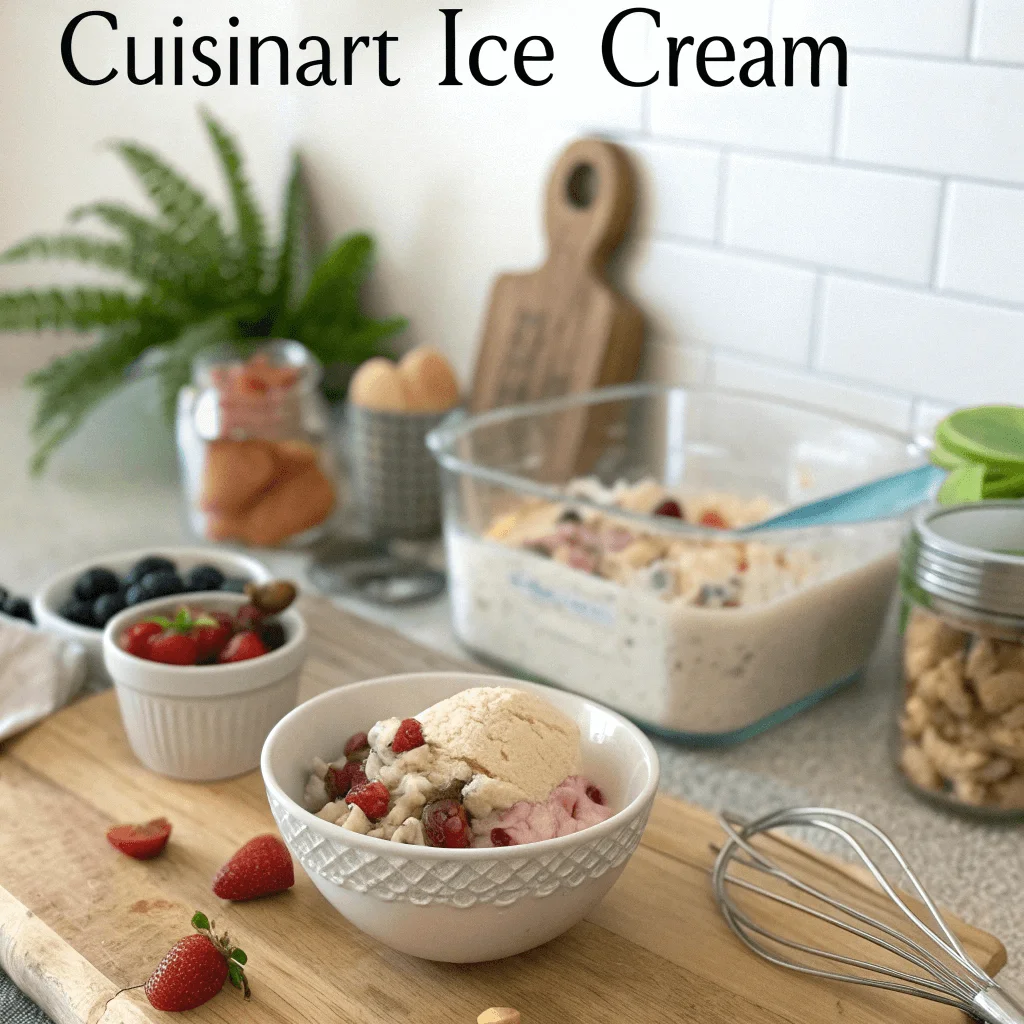
Why Use a Cuisinart Ice Cream Maker?
Easy to Use & Fast Churning: Makes Ice Cream in 20–30 Minutes
One of the biggest advantages of using a Cuisinart ice cream maker is its simplicity. Unlike traditional ice cream-making methods that require constant stirring and long freezing times, the Cuisinart ice cream maker streamlines the process.
- Pre-Freezing the Bowl: Most Cuisinart models use a double-insulated freezer bowl that needs to be frozen in advance, usually for 12–24 hours. This ensures the mixture freezes quickly and evenly when churned.
- No Complicated Setup: Just add your ingredients, turn on the machine, and let it do the work.
- Quick Results: In as little as 20–30 minutes, your ice cream reaches a soft-serve consistency, perfect for immediate enjoyment or additional freezing for a firmer texture.
This speed and ease make homemade ice cream more accessible for busy home cooks, families, and even beginners.
Customizable Recipes: Control Ingredients, Flavors, and Textures
Unlike store-bought ice cream, which often contains preservatives, artificial flavors, and high sugar content, making your own allows full control over ingredients.
- Healthier Options: Choose organic dairy, plant-based milk, or natural sweeteners like honey or maple syrup.
- Dietary Adjustments: Make vegan, keto-friendly, dairy-free, or sugar-free ice cream that suits your lifestyle.
- Endless Flavor Combinations: Experiment with classic flavors like vanilla and chocolate or get creative with unique options like lavender honey, matcha green tea, or caramel pecan swirl.
- Adjustable Texture: Control how creamy, light, or rich your ice cream turns out by tweaking the ratio of milk, cream, and eggs.
By customizing your recipe, you get exactly the taste and texture you love without any unwanted additives.
Versatile for Different Desserts: Ice Cream, Frozen Yogurt, Gelato, and Sorbet
The Cuisinart ice cream maker is not just for ice cream—it’s a multi-functional dessert machine that allows you to create a variety of frozen treats:
- Classic Ice Cream: A creamy, rich dessert made with a custard or no-cook base.
- Frozen Yogurt: A healthier, tangy alternative made with Greek yogurt or regular yogurt.
- Gelato: An Italian-style frozen dessert with a denser, silkier texture, made by using more milk and less cream than traditional ice cream.
- Sorbet & Sherbet: Dairy-free fruit-based sorbet or light, creamy sherbet made with fruit juice, sugar, and sometimes a little dairy.
This versatility makes the Cuisinart ice cream maker a great investment, especially if you enjoy a variety of frozen treats year-round.
Budget-Friendly: Cheaper and Healthier Than Store-Bought Options
While high-quality ice cream can be expensive, making it at home is more cost-effective in the long run.
- Lower Cost Per Batch: A homemade batch of ice cream can cost 50% less than premium store-bought brands.
- Bulk Ingredients Save Money: Buying milk, cream, and flavorings in bulk reduces cost.
- Eliminate Unnecessary Additives: Store-bought ice creams often include emulsifiers, artificial colors, and preservatives—homemade versions are fresher and healthier.
- More Ice Cream for the Price: One Cuisinart freezer bowl can make multiple servings at a fraction of the price of store-bought pints.
If you frequently enjoy ice cream, gelato, or sorbet, a Cuisinart ice cream maker pays for itself over time while allowing you to make healthier, more delicious frozen desserts.
Essential Ingredients for Homemade Ice Cream
Dairy & Non-Dairy Bases: Heavy Cream, Whole Milk, Coconut Milk, or Almond Milk
The base of your ice cream is what determines its creaminess, richness, and texture. You can choose from traditional dairy options or go for non-dairy alternatives to suit different dietary needs.
Dairy-Based Ice Cream Bases
- Heavy Cream + Whole Milk – The classic combination for a rich, creamy texture. Heavy cream adds buttery smoothness, while whole milk balances it out.
- Half-and-Half – A lighter alternative, using half heavy cream and half whole milk for a slightly less rich, but still creamy result.
- Evaporated Milk – Provides a denser texture with less fat than heavy cream but still keeps ice cream smooth.
Non-Dairy & Vegan Ice Cream Bases
If you’re looking for a dairy-free option, plant-based alternatives work great, though they may require stabilizers (like cornstarch or xanthan gum) to maintain creaminess.
- Coconut Milk (Full-Fat) – The best non-dairy alternative for an ultra-creamy, rich ice cream with a slight coconut flavor.
- Almond Milk – A lighter option with a mild nutty taste, but it may result in a thinner ice cream. Best when mixed with cashew or coconut milk.
- Cashew Milk – Naturally creamy and neutral in flavor, making it a great base for many flavors.
- Oat Milk – Adds a slight sweetness and smooth texture, perfect for those avoiding nuts.
The key to choosing the right base is balancing fat and liquid—higher fat content leads to smoother, creamier ice cream, while lower fat can result in icier textures.
Sweeteners & Flavoring: Sugar, Honey, Vanilla Extract, Cocoa Powder
Sweeteners and flavorings enhance the taste and texture of your ice cream. The right choice of sweetener can also affect creaminess and consistency.
Sweetener Options:
- Granulated Sugar – The standard choice, ensuring a smooth texture and balanced sweetness.
- Honey or Maple Syrup – Adds natural sweetness with a slight caramel-like depth of flavor. Best in fruit-based ice creams.
- Coconut Sugar or Brown Sugar – Offers a richer, deeper flavor, especially good for caramel, chocolate, or coffee ice creams.
- Sugar Substitutes (Stevia, Erythritol, Monk Fruit) – Ideal for low-carb or keto ice creams, but they may slightly alter texture.
Flavoring Agents:
- Vanilla Extract or Vanilla Bean – A classic, rich flavor booster that enhances the base of almost any ice cream.
- Cocoa Powder or Melted Chocolate – Essential for chocolate-based ice creams, giving a deep, indulgent taste.
- Espresso Powder – Enhances chocolate flavors and creates coffee-flavored ice creams.
- Fruit Purees – Blending real fruit into the base adds natural sweetness and vibrant flavors.
- Spices & Herbs – Cinnamon, nutmeg, or even lavender can elevate your ice cream’s complexity and uniqueness.
Mixing different sweeteners and flavors helps customize your ice cream to your taste and experiment with unique variations.
Mix-ins for Extra Flavor: Chocolate Chips, Fresh Fruit, Cookie Crumbles
Adding mix-ins takes your homemade ice cream to the next level, giving it texture, crunch, or bursts of flavor. The key is knowing when and how to add them to ensure an even distribution without affecting the ice cream’s consistency.
Best Mix-ins & When to Add Them:
- Chocolate Chips, Fudge Swirls, or Caramel Sauce – Stir in during the last 5 minutes of churning for even distribution.
- Fresh or Frozen Fruit – Berries, bananas, or mangoes should be chopped small or pureed and folded in at the end to avoid ice crystals.
- Cookie Dough or Brownie Chunks – Adds chewy texture; freeze chunks before mixing in for better texture.
- Nuts (Almonds, Pecans, Walnuts) – Toast them for a deeper flavor and mix them in at the end.
- Cereal & Candy (Oreos, Graham Crackers, Peanut Butter Cups) – Crush and stir in for extra crunch and flavor bursts.
For the best results, always freeze mix-ins before adding so they don’t melt into the ice cream while churning.
Custard vs. No-Cook Ice Cream: Difference Between Egg-Based and Eggless Recipes
The base of your ice cream can either be custard-based (egg yolks) or no-cook (eggless). Each method has its own advantages and results in slightly different textures.
Custard-Based Ice Cream (Egg Yolks) – Creamy & Rich
- Made by cooking a mixture of egg yolks, sugar, milk, and cream to form a thickened custard before churning.
- Advantage: Produces a luxuriously smooth, dense, and creamy ice cream with a velvety texture.
- Best for: Classic vanilla, chocolate, or gourmet flavors like salted caramel or pistachio.
- Downside: Requires cooking and cooling time, adding an extra step before churning.
No-Cook Ice Cream (Eggless) – Quick & Light
- Simply mix cream, milk, sugar, and flavorings together before churning—no need to cook.
- Advantage: Faster and easier to prepare with a lighter, milkier texture.
- Best for: Fruity ice creams, frozen yogurt, and quick vanilla or chocolate recipes.
- Downside: May not be as rich or smooth as custard-based ice cream.
Which One to Choose?
- If you love rich, creamy, premium-style ice cream, go for custard-based recipes.
- If you want a quicker, lighter option, eggless ice creams are the way to go.
- Hybrid option: Some recipes add a small amount of cornstarch to eggless ice cream to mimic the creaminess of a custard base without the need for eggs.
Both methods work great with the Cuisinart Ice Cream Maker, so it depends on your preference and how much time you have.
Best Cuisinart Ice Cream Maker Recipes to Try
Classic Vanilla Ice Cream
Nothing beats the simplicity and elegance of classic vanilla ice cream. This timeless recipe is perfect on its own or as a base for mix-ins and toppings.
Why You’ll Love It:
✔ Smooth, creamy, and rich
✔ Pairs well with almost any dessert
✔ Simple ingredients with a luxurious taste
Ingredients:
- 2 cups heavy cream
- 1 cup whole milk
- ¾ cup granulated sugar
- 2 teaspoons pure vanilla extract
- Pinch of salt
Instructions:
- Mix the Ingredients – In a bowl, whisk together heavy cream, milk, sugar, vanilla extract, and salt until sugar dissolves.
- Chill the Mixture – For best results, refrigerate the mixture for 1–2 hours before churning. This enhances flavor and texture.
- Churn in the Cuisinart Ice Cream Maker – Pour the mixture into the pre-frozen bowl and let it churn for 20–25 minutes until it reaches a soft-serve consistency.
- Freeze for Firmer Texture – Transfer to an airtight container and freeze for 2–4 hours for a firmer consistency.
Pro Tips:
✔ Use real vanilla bean or vanilla bean paste for a more intense flavor.
✔ Swap whole milk with 2% milk for a lighter version.
✔ Serve with chocolate sauce, fresh fruit, or warm pie for a delicious dessert.
Rich Chocolate Ice Cream
For chocolate lovers, this rich and indulgent ice cream is a must-try! It has a deep cocoa flavor with a smooth, velvety texture.
Why You’ll Love It:
✔ Made with real chocolate and cocoa powder for intense flavor
✔ Creamy and decadent, just like premium store-bought brands
✔ Perfect for chocolate lovers
Ingredients:
- 2 cups heavy cream
- 1 cup whole milk
- ¾ cup sugar
- ½ cup unsweetened cocoa powder
- 4 oz melted dark chocolate
- 1 teaspoon vanilla extract
- Pinch of salt
Instructions:
- Heat the Mixture – In a saucepan, heat the milk, sugar, and cocoa powder over medium heat, whisking until smooth.
- Melt the Chocolate – Add melted chocolate and mix until combined.
- Chill the Mixture – Allow the base to cool to room temperature, then refrigerate for at least 1–2 hours.
- Churn the Ice Cream – Pour the mixture into your Cuisinart ice cream maker and churn for 25–30 minutes.
- Freeze Until Firm – Transfer to a container and freeze for a few hours for a scoopable consistency.
Pro Tips:
✔ Add chocolate chips, brownie chunks, or a fudge swirl for extra indulgence.
✔ Use dark cocoa powder for an intense chocolate taste.
✔ Substitute coconut milk for a dairy-free option.
Dairy-Free Coconut Ice Cream (Vegan & Paleo-Friendly)
This luscious, creamy coconut ice cream is perfect for those who want a dairy-free, vegan-friendly alternative. It has a naturally sweet coconut flavor and a rich texture.
Why You’ll Love It:
✔ 100% dairy-free and vegan
✔ Naturally sweet and tropical
✔ Simple ingredients with no artificial additives
Ingredients:
- 2 cans full-fat coconut milk
- ½ cup maple syrup or agave nectar
- 2 teaspoons vanilla extract
- 1 tablespoon arrowroot starch or cornstarch (for extra creaminess)
- Pinch of salt
Instructions:
- Blend the Ingredients – Whisk together coconut milk, maple syrup, vanilla, salt, and starch in a bowl.
- Chill the Mixture – Refrigerate for at least 2 hours before churning.
- Churn the Ice Cream – Pour into your Cuisinart ice cream maker and churn for 20–25 minutes.
- Freeze Until Firm – Transfer to a freezer-safe container and freeze for at least 2 hours.
Pro Tips:
✔ Use coconut cream instead of coconut milk for an ultra-creamy texture.
✔ Mix in toasted coconut flakes or dark chocolate chips for extra flavor.
✔ For a fruitier twist, add blended mango or pineapple to the base.
Refreshing Strawberry Sorbet (Dairy-Free & Naturally Sweetened)
If you’re craving something light, fruity, and refreshing, this strawberry sorbet is the perfect choice. It’s made with real strawberries and has a vibrant, tangy-sweet flavor.
Why You’ll Love It:
✔ Only 3 ingredients
✔ Naturally dairy-free and low-fat
✔ Refreshing, fruity, and perfect for summer
Ingredients:
- 3 cups fresh or frozen strawberries
- ½ cup sugar or honey (adjust based on sweetness preference)
- 1 tablespoon lemon juice
Instructions:
- Blend the Ingredients – In a blender, purée strawberries, sugar, and lemon juice until smooth.
- Strain the Mixture (optional) – For a smoother texture, strain the purée to remove seeds.
- Chill Before Churning – Refrigerate the mixture for 1 hour to enhance flavor.
- Churn in the Cuisinart Ice Cream Maker – Pour the mixture into the ice cream maker and churn for 20 minutes.
- Freeze for a Firmer Texture – Transfer to a container and freeze for 1–2 hours.
Pro Tips:
✔ Use a mix of strawberries and raspberries for extra flavor.
✔ Add a splash of vodka or lemon liqueur to keep the sorbet softer.
✔ Replace sugar with agave nectar or monk fruit sweetener for a lower-sugar option.
Final Thoughts
These four recipes showcase the versatility of a Cuisinart ice cream maker—from classic rich and creamy flavors to dairy-free and fruity options. Whether you’re a fan of traditional vanilla, indulgent chocolate, tropical coconut, or refreshing sorbet, there’s a homemade ice cream recipe for everyone!
Tips for Perfect Homemade Ice Cream Every Time
Pre-Freeze the Freezer Bowl: Ensure It’s Completely Frozen Before Churning
One of the most crucial steps for success with a Cuisinart ice cream maker is to properly pre-freeze the freezer bowl before you begin.
Why is this important?
The freezer bowl contains a special cooling liquid inside its walls, which needs to be frozen solid to churn ice cream effectively. If it’s not fully frozen, your ice cream won’t set properly and may turn out soupy.
How to Pre-Freeze Correctly:
✔ Freeze for at Least 12–24 Hours – Place the freezer bowl in your freezer the night before or ideally 24 hours in advance.
✔ Shake Test – Before using, shake the bowl—if you hear any liquid sloshing inside, it’s not fully frozen yet.
✔ Store at 0°F (-18°C) or Lower – For best results, your freezer should be at the coldest setting possible.
✔ Keep the Bowl in the Freezer – If you make ice cream often, store the bowl in the freezer at all times so it’s always ready to go.
Pro Tip:
If your ice cream maker allows for an extra freezer bowl, consider buying a second one so you can make multiple batches back-to-back!
Chill the Ice Cream Base: A Cold Mixture Churns Into Creamier Ice Cream
Before you start churning, it’s essential to chill your ice cream mixture in the refrigerator.
Why is chilling important?
- A cold base churns faster, resulting in smoother, creamier ice cream.
- It stops ice crystals from forming, creating a smooth and silky texture.
- Chilling allows the flavors to meld and develop, enhancing the taste.
How to Chill the Base Correctly:
✔ Refrigerate for at Least 1–2 Hours – After mixing your ingredients, cover and chill in the fridge before churning.
✔ Overnight Chilling is Even Better – Letting the mixture sit overnight intensifies flavors and ensures even freezing.
✔ Keep Ingredients Cold from the Start – Use cold milk, cream, and mix-ins to help speed up the chilling process.
Pro Tip:
If you’re short on time, use an ice bath—place the bowl of ice cream mixture inside a larger bowl filled with ice and water to cool it down quickly.
Avoid Over-Churning: Stop When the Ice Cream Reaches a Soft-Serve Texture
Over-churning can ruin the texture of your ice cream, making it too dense or causing it to become grainy.
How Do You Know When to Stop Churning?
- Most ice creams are ready after 20–30 minutes of churning.
- The texture should look like soft-serve ice cream—smooth, thick, and airy.
- Over-churning can make ice cream too stiff, causing fat separation and making it feel greasy or icy.
How to Avoid Over-Churning:
✔ Follow the Manufacturer’s Time Guide – Each Cuisinart model may have a slightly different churn time, so check the instructions.
✔ Stop When It’s Soft-Serve Consistency – Ice cream will continue to firm up in the freezer. If you churn too long, it can turn grainy.
✔ Watch for Changes in Texture – If the machine starts struggling or the mixture looks too thick, it’s time to stop.
Pro Tip:
If you’re adding mix-ins like chocolate chips or cookie crumbles, add them in the last 5 minutes of churning so they distribute evenly without sinking.
Store Properly: Keep in an Airtight Container to Prevent Ice Crystals
Once your ice cream is churned, proper storage is key to maintaining its freshness and preventing unwanted ice crystals.
Best Ways to Store Homemade Ice Cream:
✔ Use an Airtight Container – This prevents air from getting in, which can cause freezer burn.
✔ Press Plastic Wrap on the Surface – Before sealing the container, press a layer of plastic wrap directly onto the ice cream to prevent ice crystals from forming.
✔ Store in the Back of the Freezer – Keep your ice cream away from the freezer door, where temperature fluctuations can affect texture.
✔ Label and Date It – Homemade ice cream is best within 1–2 weeks, as it lacks preservatives found in store-bought versions.
Pro Tip:
If your ice cream hardens too much, let it sit at room temperature for 5–10 minutes before scooping. Avoid microwaving, as it melts unevenly!
Final Thoughts
By following these key steps—pre-freezing the bowl, chilling the base, avoiding over-churning, and storing properly—you’ll achieve perfectly creamy, smooth, and delicious ice cream every time with your Cuisinart Ice Cream Maker!
FAQs About Cuisinart Ice Cream Maker Recipes
How Long Does Homemade Ice Cream Last?
Homemade ice cream, unlike store-bought versions, doesn’t contain preservatives and stabilizers, so its shelf life is typically shorter. However, with proper storage, you can keep your homemade ice cream fresh for up to 2–3 weeks. The key to extending its freshness is to store it in an airtight container to prevent air exposure, which can cause freezer burn and affect the texture. Ice cream made with dairy and eggs tends to last a bit longer than fruit-based sorbets. Also, keep your ice cream stored at a consistent temperature in the freezer—ideally at 0°F (-18°C) or lower—since temperature fluctuations can impact its quality. If you notice ice crystals, off smells, or the texture becoming too dry and icy, it’s time to toss it out and make a fresh batch. For the best flavor and texture, try to enjoy your homemade ice cream within the first 1–2 weeks.
Can I Make Gelato in a Cuisinart Ice Cream Maker?
Yes, you can definitely make gelato in a Cuisinart ice cream maker, but there are a few differences between gelato and traditional ice cream. The primary distinction lies in the ingredients and texture. Gelato typically has more milk and less cream compared to ice cream, which gives it a denser, creamier texture. It also uses fewer or no egg yolks in the base. Gelato is churned more slowly than ice cream, which results in less air being incorporated into the mixture, making it denser. For the best gelato, aim for a lower fat content by using more milk and less cream, and remember that gelato is typically served at a slightly warmer temperature than ice cream—around 10–15°F (-12°C). If your Cuisinart ice cream maker doesn’t have a specific gelato setting, you can still make it by simply churning at a slower speed for a bit longer than usual. Let the gelato sit for a few minutes before serving for the best texture. For authentic gelato flavors, try classics like pistachio, hazelnut, or stracciatella (chocolate shavings).
What’s the Best Way to Make Ice Cream Without Eggs?
Making ice cream without eggs is easier and quicker, and it also gives you a lighter product. In an eggless ice cream base, you typically use just dairy, sugar, and flavorings. A basic egg-free ice cream recipe would include heavy cream, whole milk, sugar, and a dash of vanilla extract. Simply whisk together the ingredients, chill the mixture in the fridge for at least 1-2 hours, and then churn it in your Cuisinart ice cream maker for 20–30 minutes until it reaches a soft-serve consistency. Eggless recipes are perfect for a simple, creamy base and can be customized with all kinds of mix-ins. For a custard-like texture without eggs, you could also add sweetened condensed milk or experiment with cornstarch to thicken the base. For dairy-free or vegan ice cream, coconut or almond milk can be used as a substitute for dairy, and avocado or banana puree can provide a creamy texture.
Can I Add Mix-Ins While Churning?
Yes, you can and should add mix-ins while churning to get them evenly distributed throughout the ice cream. The key is timing—mix-ins should be added during the last 5 minutes of the churning process to prevent them from sinking or getting broken apart too much. Popular mix-ins include chocolate chips, crushed cookies, brownie pieces, fresh fruit, and toasted nuts. When adding them, make sure they’re small pieces and that they’re chilled so they don’t melt and disrupt the churning process. You can also add sauces or swirls like caramel, fudge, or fruit compotes after the churning is done, by gently layering them through the ice cream. If you’re adding larger items like cookie dough or brownies, it’s best to freeze them first to prevent them from dissolving into the mixture. With these tips, you’ll have perfectly textured ice cream with evenly distributed mix-ins!
Final Thoughts
Now you know everything about making the perfect ice cream with a Cuisinart ice cream maker! From storage tips to making gelato and adding mix-ins, you’re ready to experiment with endless flavor possibilities. Whether you’re making egg-free ice cream or layering in your favorite mix-ins, the results will always be creamy, delicious, and homemade. 😊🍨
Enjoy Homemade Ice Cream with Endless Possibilities
Making ice cream at home with a Cuisinart ice cream maker is not only fun but also incredibly rewarding. With just a few simple ingredients and some creativity, you can craft an endless variety of creamy, indulgent desserts right in your kitchen. From classic vanilla and chocolate ice cream to more adventurous flavors like strawberry sorbet or dairy-free coconut ice cream, the possibilities are limited only by your imagination.
As we’ve covered in this post, the Cuisinart ice cream maker is designed to make the process of homemade ice cream as easy and fast as possible. The churning time of 20–30 minutes means you don’t have to wait hours for a treat, and its customizable recipes let you control the ingredients, flavors, and textures to suit your preferences. Whether you’re craving a rich, custard-like ice cream or a refreshing fruit sorbet, this machine allows you to create the perfect dessert every time.
Beyond just ice cream, the Cuisinart ice cream maker is incredibly versatile, able to handle frozen treats like gelato, frozen yogurt, and sorbet. The eggless, dairy-free, and vegan options ensure that everyone in your family can enjoy homemade frozen desserts, regardless of dietary preferences. By controlling your ingredients, you can make healthier, lighter desserts that don’t rely on the added sugars and preservatives found in store-bought versions.
It’s also a budget-friendly alternative to purchasing ice cream from the store. Not only does it save you money, but it also allows you to experiment with different flavors, creating gourmet-style desserts right at home. With no special skills required and only a few easy-to-follow tips and recipes, anyone can enjoy the joy of making homemade ice cream.
Remember, the key to perfect ice cream is prepping your freezer bowl, chilling your base, and not over-churning. With these simple tips and a little patience, you’ll be able to make creamy, smooth, and delicious frozen treats in no time. Whether you’re hosting a summer party, treating yourself after a long day, or simply experimenting with new flavors, your Cuisinart ice cream maker will soon become your go-to kitchen tool for indulgent frozen desserts.
So why not give it a try? Grab your ingredients, fire up your ice cream maker, and start creating your favorite homemade frozen treats today.