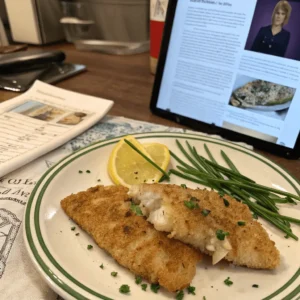
Walleye is a prized freshwater fish known for its mild, sweet flavor and flaky texture, making it one of the best choices for frying. Whether you’re a fishing enthusiast who caught a fresh batch or simply looking to recreate a classic fish fry at home, this fried walleye recipe will guide you step by step to achieve a perfectly crispy, golden-brown crust while keeping the fish tender and juicy inside.
This recipe is inspired by Midwest fish fry traditions, where walleye is often the star of the meal. By using a flavorful breading mix of cornmeal, panko breadcrumbs, and Old Bay seasoning, combined with a buttermilk marinade, we ensure each bite is packed with crunch and flavor.
In this guide, we’ll walk you through selecting the best walleye fillets, creating the perfect breading, and mastering the frying technique for the ultimate crispy fish. Plus, we’ll cover variations like beer-battered walleye and tips on pairing your dish with classic sides like tartar sauce, coleslaw, and Midwest-style potato salad.
Ready to cook up a restaurant-quality fried walleye dish at home? Let’s dive in!
Why Walleye is the Best Fish for Frying
Mild, Sweet Flavor – Why Walleye’s Taste Makes It Perfect for Frying
Walleye is often considered one of the best-tasting freshwater fish, thanks to its mild, slightly sweet flavor. Unlike stronger-tasting fish like salmon or catfish, walleye doesn’t have an overpowering “fishy” taste, making it appealing to both seafood lovers and those who typically prefer milder flavors.
This subtle sweetness pairs exceptionally well with a variety of seasonings and breading styles, allowing the natural flavor of the fish to shine while still absorbing the rich, savory taste of the coating. Whether you opt for a classic cornmeal breading, a crispy Panko crust, or a light beer batter, walleye adapts beautifully to different frying techniques.
Additionally, walleye’s flavor profile makes it a great canvas for complementary seasonings like Old Bay, garlic powder, lemon pepper, and paprika. This versatility means you can tweak the seasonings to suit your personal taste while still letting the fish be the star of the dish.
Firm Yet Flaky Texture – How It Holds Up Well to Frying
One of the standout features of walleye is its ideal texture for frying. The fillets are firm enough to hold their shape during cooking, but once fried to perfection, they develop a delicate flaky interior that practically melts in your mouth.
The structure of walleye fillets allows them to crisp up beautifully on the outside while remaining moist and tender on the inside. This makes it a great choice for pan-frying, deep-frying, or air-frying, as it holds up well under high heat and doesn’t fall apart like softer fish such as tilapia.
To get the best results, it’s essential to pat the fillets dry before breading to ensure the coating adheres properly. A buttermilk soak can further enhance the texture, helping to keep the fish tender while adding a slight tangy flavor that complements the crispy crust.
Popular in Midwest Fish Fries – Cultural Significance and Tradition
Fried walleye holds a special place in Midwest food culture, particularly in states like Minnesota, Wisconsin, and Michigan, where Friday night fish fries are a cherished tradition. These gatherings often take place in restaurants, churches, and community centers, where locals come together to enjoy a meal of crispy fried fish, coleslaw, fries, and rye bread.
Walleye, being abundant in the Great Lakes and other Midwestern freshwater bodies, has become one of the most sought-after fish for these events. Many fishing enthusiasts take pride in catching their own walleye, filleting it, and frying it up fresh for friends and family.
Aside from its regional popularity, walleye is also a staple in Canadian shore lunches, where anglers prepare freshly caught fish over an open fire using simple breading and frying techniques. This rustic, back-to-basics cooking method highlights the natural quality of the fish and has contributed to walleye’s legendary status among fishing communities.
Whether you’re at a lakeside cabin enjoying a fresh catch or cooking up a homemade batch for a family gathering, fried walleye remains a beloved dish that brings people together, making it more than just a meal—it’s an experience.
Ingredients You Need for the Best Fried Walleye
Fresh Walleye Fillets – Best Practices for Choosing Fresh Fish
The key to making the best fried walleye starts with selecting the freshest fillets. Whether you’re catching it yourself or purchasing from a local fish market, here are some tips to ensure you get high-quality walleye:
1. Look for Clear, Bright Eyes (If Buying Whole)
If you’re buying a whole walleye, check the eyes—they should be clear, bright, and slightly bulging. Cloudy or sunken eyes can be a sign that the fish is not fresh.
2. Check the Smell
Fresh walleye should have a clean, mild, slightly briny scent, reminiscent of freshwater lakes. If the fish smells overly fishy, sour, or ammonia-like, it’s best to avoid it.
3. Examine the Flesh
- Fresh walleye fillets should be firm and slightly translucent, not mushy or dull.
- When you press the fillet lightly, it should bounce back rather than leave an indentation.
- The color should be a light pinkish-white with no signs of discoloration or dryness.
4. Keep It Cold
If you’re catching walleye yourself, immediately place it on ice or in a cooler to preserve freshness. When purchasing from a store, bring an insulated bag or cooler to maintain the temperature until you get home.
5. Use Fresh Fish Within 1–2 Days
For optimal flavor and texture, cook fresh walleye within 24–48 hours. If you need to store it longer, wrap the fillets in plastic wrap and aluminum foil, then freeze them for up to 3 months.
Crispy Breading Mix – Cornmeal, Panko Breadcrumbs, and Seasoning
The breading mix plays a crucial role in achieving that golden, crispy crust that makes fried walleye irresistible. A well-balanced breading provides the perfect crunch while locking in the fish’s moisture.
1. Cornmeal for a Classic Crunch
Cornmeal is a traditional ingredient in Midwest-style fish fries, giving the fillets a slightly gritty, crunchy texture. It works exceptionally well for those who prefer a rustic, Southern-style crisp.
2. Panko Breadcrumbs for Extra Light Crispiness
Panko breadcrumbs are larger and flakier than regular breadcrumbs, resulting in an airy, super-crispy coating. They work well when combined with cornmeal or used alone for a Japanese-style light crisp texture.
3. Flour for Even Coating
A small amount of flour in the breading mix helps the coating stick to the fish and creates an even base for the crunchier elements. A blend of all-purpose flour and cornstarch can make the crust even crispier.
4. Seasoning for Flavor
A good breading mix isn’t just about texture—it needs to be flavorful too. Popular additions include:
- Old Bay seasoning – A classic seafood seasoning with a mix of spices and herbs.
- Garlic powder & onion powder – Adds depth and a savory kick.
- Smoked paprika – Enhances the golden-brown color and adds a subtle smokiness.
- Salt & black pepper – Essential for balancing the overall taste.
Key Seasonings & Marinade – Old Bay Seasoning, Buttermilk, and Lemon Wedges
A great fried walleye recipe doesn’t just rely on breading—the seasonings and marinade are just as important for infusing flavor into the fish.
1. Old Bay Seasoning – The Classic Seafood Blend
Old Bay seasoning is a staple in seafood recipes, offering a balanced mix of salt, paprika, celery salt, and other spices. It enhances the natural sweetness of walleye while adding a mild heat and savory depth.
2. Buttermilk Marinade for Tenderness & Flavor
Soaking the walleye fillets in buttermilk before breading does two important things:
- Tenderizes the fish – The natural acidity in buttermilk gently breaks down proteins, keeping the fish moist and flaky.
- Helps the breading stick better – The slight thickness of buttermilk helps the flour and cornmeal adhere evenly to the fish.
If you don’t have buttermilk, you can make a quick substitute by mixing 1 cup of milk with 1 tablespoon of lemon juice or vinegar and letting it sit for 5 minutes.
3. Lemon Wedges for Brightness
Fresh lemon wedges are the perfect finishing touch for fried walleye. The acidity of the lemon juice cuts through the richness of the fried fish, adding a burst of freshness that balances out the flavors.
For an extra citrusy kick, you can also add lemon zest to your breading mix or squeeze lemon over the fish before serving.
Step-by-Step Instructions for Frying Walleye

Step 1: Preparing the Fish – Cleaning, Drying, and Marinating in Buttermilk
Before you begin frying, it’s essential to properly prepare the walleye fillets to ensure they turn out tender, flavorful, and crispy.
1. Cleaning the Walleye Fillets
If you’ve caught fresh walleye, start by cleaning and filleting the fish:
- Descale the fish using a fish scaler or the back of a knife, if needed.
- Remove the skin (optional) by placing the fillet skin-side down and carefully running a sharp knife between the skin and flesh.
- Debone the fillet by feeling for any remaining pin bones and removing them with tweezers or needle-nose pliers.
If you’ve purchased pre-filleted walleye, rinse the fillets under cold water to remove any excess slime or fishy residue.
2. Pat the Fish Dry
Before marinating or breading, pat the fillets dry with paper towels. Excess moisture can cause the breading to fall off while frying and can lead to soggy fish. Drying the fillets helps create a better bond between the breading and the fish.
3. Marinate in Buttermilk
Marinating the walleye in buttermilk for 30 minutes to an hour does two things:
- Tenderizes the fish – Buttermilk’s mild acidity breaks down proteins slightly, resulting in softer, flakier fillets.
- Enhances flavor – The slight tang of buttermilk balances the mild sweetness of the walleye.
For extra flavor, you can add seasonings directly to the buttermilk, such as Old Bay seasoning, garlic powder, or hot sauce for a subtle kick.
After marinating, let the excess buttermilk drip off before breading.
Step 2: Making the Perfect Breading – Mixing Cornmeal, Flour, and Spices
The breading is what gives fried walleye its crispy, golden exterior. A well-balanced mix of flour, cornmeal, and seasonings ensures the perfect crunch while complementing the delicate fish.
1. Dry Ingredient Ratio
For a balanced, crispy coating, mix:
- ½ cup cornmeal – Adds a coarse, crunchy texture.
- ½ cup all-purpose flour – Helps create an even, smooth base for frying.
- ¼ cup Panko breadcrumbs (optional) – Provides an extra crispy, airy crunch.
2. Essential Seasonings for Flavor
Season your breading mix with:
- 1 tsp Old Bay seasoning (or Cajun seasoning for a spicier kick)
- ½ tsp smoked paprika (for color and subtle smokiness)
- ½ tsp garlic powder & onion powder (adds depth to the coating)
- ½ tsp salt & black pepper (to enhance overall flavor)
For extra crunch, you can also mix in a tablespoon of cornstarch, which helps create an ultra-light and crispy coating.
3. Coat the Fish Properly
- Dredge the buttermilk-marinated fillets in the breading mix, pressing gently to ensure an even coat.
- Let the fillets rest for 5–10 minutes before frying. This helps the breading stick better and prevents it from falling off during frying.
Step 3: Frying to Golden Perfection – Using a Cast-Iron Skillet for Crispy Results
Now it’s time to fry your walleye to crispy, golden perfection! The key is using the right oil, temperature, and technique.
1. Choosing the Right Oil
an oil with a high smoke point should be used to prevent burning. Some of the best options include:
- Peanut oil – Great for a rich, crispy finish.
- Canola or vegetable oil – Neutral flavor and widely available.
- Sunflower or safflower oil – Clean, light taste that doesn’t overpower the fish.
Avoid butter or olive oil, as they burn too quickly at high frying temperatures.
2. Heat the Oil to the Perfect Temperature
- Heat the oil to 350–375°F (175–190°C) in a cast-iron skillet or deep fryer.
- If you don’t have a thermometer, test the oil by dropping a small amount of breading into it—if it sizzles immediately and turns golden within 10–15 seconds, it’s ready.
3. Frying the Walleye Fillets
- Gently place the fillets into the hot oil, making sure not to overcrowd the pan (this lowers the temperature and leads to soggy fish).
- Fry for 3–4 minutes per side, or until the fillets are golden brown and crispy.
- Flip the fillets once using tongs or a slotted spatula to avoid breaking them.
4. Check for Doneness
- The fish should be golden and crispy on the outside.
- Make sure the internal temperature reaches 145°F (63°C) for safe consumption.
- The fillet should flake easily with a fork.
Step 4: Draining & Serving – How to Keep It Crispy While Serving
Once the walleye fillets are fried to perfection, the next step is keeping them crispy until served.
1. Drain the Fish Properly
Instead of placing the fried fillets directly on a paper towel (which can trap steam and make them soggy), use one of these methods:
- Wire rack over a baking sheet – Allows airflow to keep the fillets crispy.
- Brown paper bags or parchment paper – Absorbs excess oil without trapping steam.
2. Keep Fried Fish Warm Without Getting Soggy
If you’re frying multiple batches, keep the cooked fillets warm in a 200°F (95°C) oven while you finish frying the rest. Place them on a wire rack inside the oven so they stay crisp without overcooking.
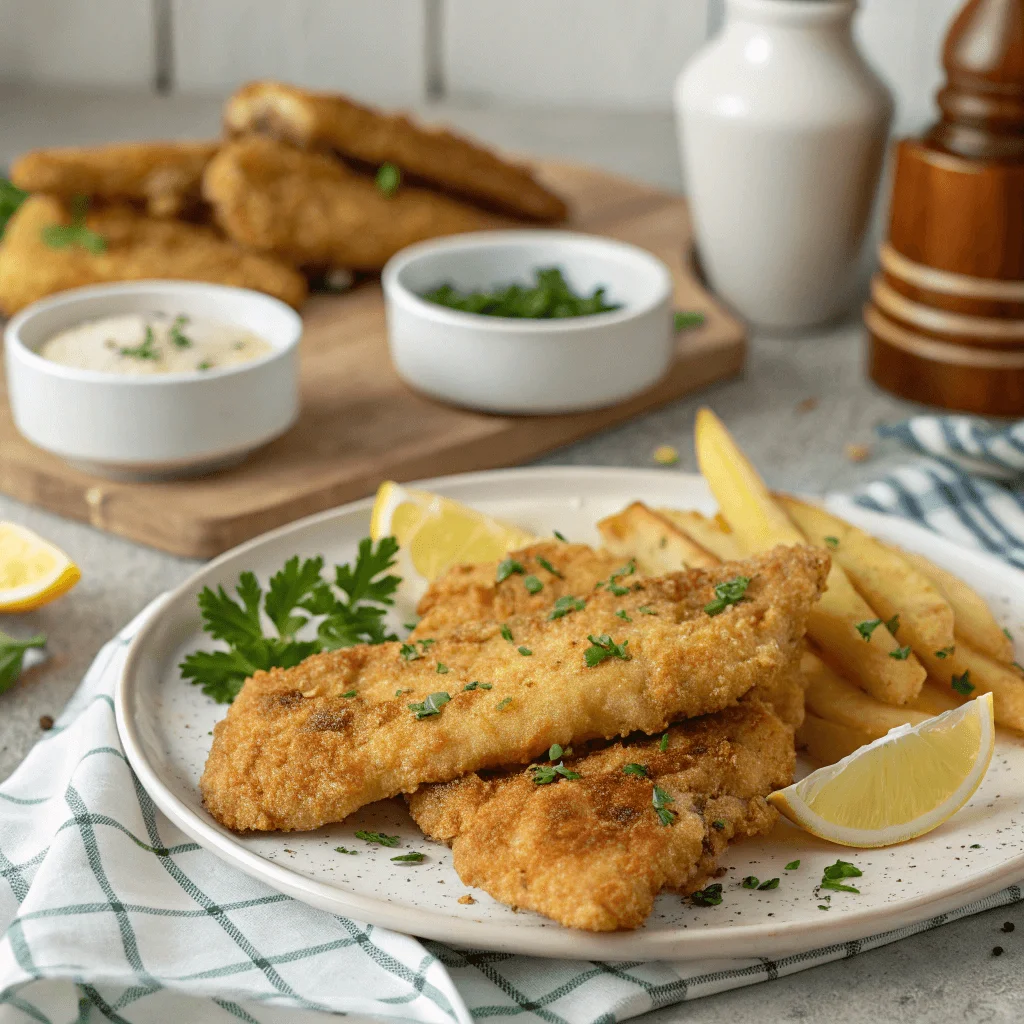
3. Serve with the Perfect Accompaniments
Fried walleye is best enjoyed fresh and hot, served with classic sides like:
- Tartar sauce – A creamy, tangy dip that pairs perfectly with crispy fish.
- Lemon wedges – A squeeze of fresh lemon enhances the flavor.
- Coleslaw – Adds a refreshing crunch that balances the richness of the fried fish.
- French fries, hush puppies, or potato salad – Classic Midwest-style sides for a complete meal.
4. Storing & Reheating Leftovers
Store leftovers in an airtight container in the fridge for up to 2 days. To reheat while maintaining crispiness:
- Oven method – Reheat at 375°F (190°C) for 10 minutes on a wire rack.
- Air fryer method – Reheat at 350°F (175°C) for 5–7 minutes.
- Avoid microwaving – It makes the breading soggy.
By following these steps, you’ll create perfectly crispy, flavorful fried walleye that rivals any restaurant fish fry. Let me know if you need any more details! 😊
Tips & Variations for the Perfect Fried Walleye
Beer-Battered Walleye – Alternative Method for Extra Crunch
If you’re looking for an even crispier, airier texture, beer-battered walleye is a fantastic alternative to traditional breaded frying. The carbonation in beer helps create a light, golden, and ultra-crunchy crust while keeping the fish moist and tender inside.
1. Why Use Beer in the Batter?
- Creates a light and airy texture – The bubbles in beer add lift, making the batter crispier.
- Adds subtle flavor – Different beers bring different notes to the batter, from a mild maltiness to a hint of bitterness.
- Helps the batter brown beautifully – The sugars in beer contribute to a rich golden color.
2. Choosing the Right Beer
The type of beer you use can influence the flavor of your batter. Here are some great options:
- Light lagers or pilsners – Mild, crisp, and perfect for a classic fried fish flavor.
- Pale ales – Add a slightly hoppy bitterness that balances well with the fish.
- Wheat beers – Provide a hint of sweetness and a smooth texture.
- Avoid dark beers like stouts or porters, as they can overpower the delicate walleye flavor.
3. Beer Batter Recipe for Walleye
To make a simple yet flavorful beer batter, mix the following:
- 1 cup all-purpose flour
- ½ cup cornstarch (for extra crispiness)
- 1 teaspoon baking powder (adds lightness)
- ½ teaspoon salt
- ½ teaspoon garlic powder
- 1 teaspoon Old Bay seasoning
- 1 cup cold beer (adjust as needed for a smooth, pancake-like consistency)
4. How to Fry Beer-Battered Walleye
- Pat the walleye fillets dry to help the batter stick.
- Dredge the fillets in a light dusting of flour before dipping them in the beer batter—this helps the batter adhere better.
- Dip into the batter, letting excess drip off.
- Fry in 350–375°F oil for 4–5 minutes per side, until golden brown and crispy.
- Drain on a wire rack and serve immediately.
Beer-battered walleye pairs perfectly with homemade tartar sauce and a side of crispy fries or coleslaw for a restaurant-style meal at home.
Deep-Fried vs. Pan-Fried – Pros and Cons of Each Method
When it comes to frying walleye, both deep-frying and pan-frying are excellent methods, but they offer different results. Here’s how they compare:
Deep-Fried Walleye
Deep-frying submerges the fillets completely in hot oil, resulting in an evenly crispy, golden crust.
✅ Pros:
- Ultimate crunch and restaurant-quality texture.
- Even cooking with minimal flipping.
- Works well for large batches.
❌ Cons:
- Requires more oil (can be costly).
- More clean-up due to oil splatter.
- Needs a deep fryer or large pot for best results.
Best For:
- Beer-battered walleye.
- Large gatherings or fish fries.
- Achieving an ultra-crispy, uniform crust.
Pan-Fried Walleye
Pan-frying uses less oil and is ideal for a thinner, crispier crust with a slightly lighter texture.
✅ Pros:
- Uses less oil (healthier and more cost-effective).
- Easier cleanup compared to deep-frying.
- Allows for more control over browning.
❌ Cons:
- Requires flipping, which can break delicate fillets.
- Slightly less even crispiness compared to deep-frying.
- Can’t handle as many fillets at once.
Best For:
- Cornmeal-crusted or lightly breaded walleye.
- Cooking small batches at home.
- When you prefer a more delicate, golden crust.
Final Verdict:
- If you want extra crunch and a traditional fish fry experience, go for deep-frying.
- If you prefer a lighter, slightly healthier approach, pan-frying is a great option.
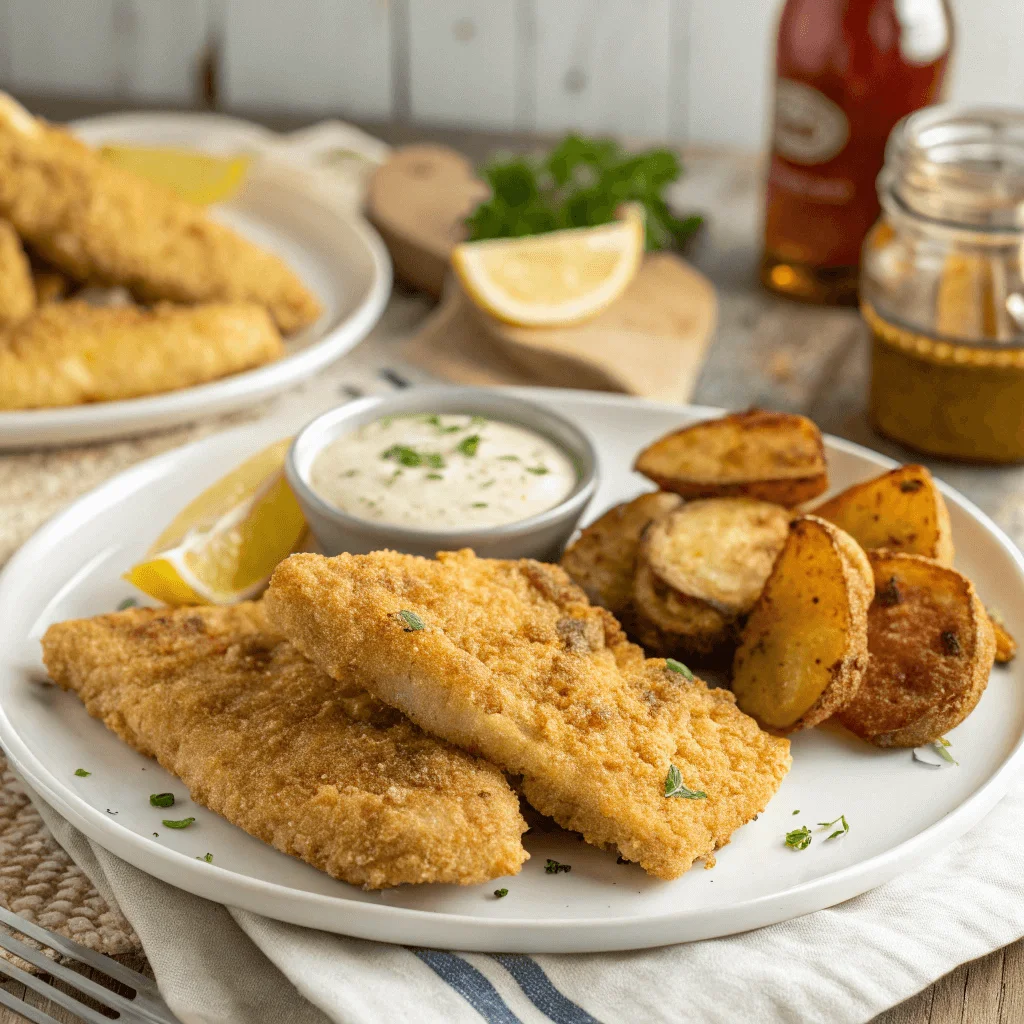
Best Sides & Dips – Tartar Sauce, Coleslaw, and Midwest-Style Potato Salad
No fried walleye meal is complete without the perfect sides and dipping sauces! Here are some Midwest-style favorites that complement the crispy, golden fish.
1. Homemade Tartar Sauce – The Classic Fish Dip
Tartar sauce is a must-have dip for fried walleye, providing a creamy, tangy contrast to the crunchy fish.
Easy Tartar Sauce Recipe:
- ½ cup mayonnaise
- 1 tablespoon dill pickle relish (or finely chopped pickles)
- 1 teaspoon Dijon mustard
- 1 teaspoon lemon juice
- ½ teaspoon Worcestershire sauce
- ½ teaspoon dried dill or fresh chopped dill
- Salt and black pepper to taste
Mix all ingredients and let it chill for at least 15 minutes for the flavors to meld.
2. Coleslaw – A Fresh, Crunchy Side
Coleslaw adds a cool, crunchy contrast to hot fried fish and helps balance out the richness.
Simple Coleslaw Recipe:
- 3 cups shredded cabbage (green and purple for color)
- ½ cup shredded carrots
- ¼ cup mayonnaise
- 1 tablespoon apple cider vinegar
- 1 teaspoon sugar
- ½ teaspoon salt and pepper
Toss everything together and refrigerate for at least 30 minutes before serving.
3. Midwest-Style Potato Salad – A Hearty Side
A classic Midwest fish fry often includes creamy potato salad as a side dish.
Traditional Potato Salad Recipe:
- 3 large russet potatoes, boiled and cubed
- ½ cup mayonnaise
- 1 tablespoon yellow mustard
- 2 tablespoons chopped pickles or relish
- 1 teaspoon apple cider vinegar
- ½ teaspoon paprika
- Salt & pepper to taste
- 2 hard-boiled eggs, chopped
- ¼ cup diced onion and celery
Mix all ingredients and chill for at least 1 hour before serving.
Bonus Side Dish Ideas for a Complete Meal:
- French fries or sweet potato fries – Classic crispy sides.
- Hush puppies – Southern-style cornmeal fritters.
- Corn on the cob – A sweet, buttery side that pairs well with fried fish.
- Baked beans – A sweet and smoky addition to a fish fry plate.
Final Thoughts
Whether you go for beer-battered or classic breaded walleye, choose deep-frying for extra crispiness or pan-frying for a lighter crunch, the right preparation method will make your fried walleye perfectly golden and delicious. Pair it with homemade tartar sauce, coleslaw, and Midwest-style potato salad for an authentic fish fry experience.
Frequently Asked Questions About Fried Walleye
What Oil is Best for Frying Walleye?
Choosing the right oil for frying walleye is crucial to achieving a crispy, golden crust without an overpowering flavor or burnt aftertaste. The best oils have a high smoke point (to prevent burning) and a neutral or complementary flavor that enhances the fish without overpowering it.
1. Best Oils for Frying Walleye
Here are some top oil choices based on their smoke point and suitability for frying:
✅ Peanut Oil (Best for Extra Crispiness)
- Smoke Point: 450°F (232°C)
- Neutral taste with a slight nuttiness that enhances the breading.
- Great for deep-frying as it maintains high temperatures well.
✅ Canola Oil (Budget-Friendly and Widely Available)
- Smoke Point: 400°F (204°C)
- Neutral flavor, allowing the fish’s natural taste to shine.
- A popular choice for both deep-frying and pan-frying.
✅ Vegetable Oil (A Common, Reliable Option)
- Smoke Point: 400–450°F (204–232°C)
- A blend of different oils like soybean and corn, making it versatile.
- Affordable and widely available.
✅ Sunflower or Safflower Oil (Light & Clean Flavor)
- Smoke Point: 440–450°F (227–232°C)
- Doesn’t add any unwanted flavors to the fish.
- Ideal for high-heat frying.
✅ Lard or Beef Tallow (For Old-School Flavor)
- Smoke Point: 370–400°F (188–204°C)
- Traditional choice for Midwest fish fries.
- Adds a rich, savory depth to fried foods.
2. Oils to Avoid
❌ Olive Oil – Low smoke point (325–375°F), can burn easily and alter the flavor.
❌ Butter – Burns too quickly, making it unsuitable for frying.
❌ Coconut Oil – Has a strong flavor that may not pair well with walleye.
3. Best Practices for Frying Oil
- Use fresh oil – Reusing oil too many times can affect flavor and crispiness.
- Maintain the right temperature (350–375°F) – If the oil is too cool, the fish will absorb excess oil and become greasy; too hot, and the breading will burn before the fish is fully cooked.
- Strain and store used oil properly – If you plan to reuse oil, strain out any leftover breading bits and store it in a sealed container.
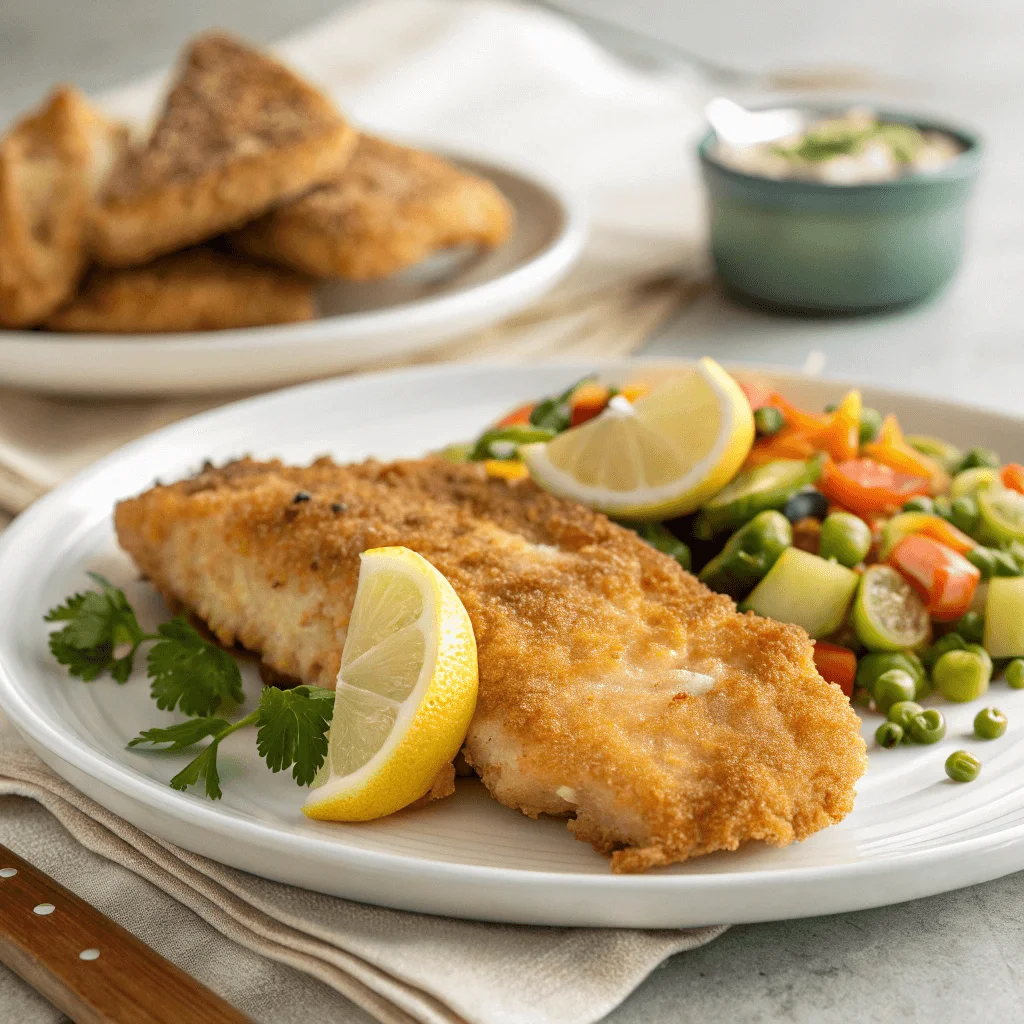
Can I Bake or Air-Fry Walleye Instead?
Yes! If you’re looking for a healthier alternative to deep-frying, baking or air-frying walleye can still give you a crispy, flavorful result—without the extra oil.
1. Baked Walleye – A Healthier, Oven-Crisped Alternative
Baking walleye is a great way to reduce calories while still achieving a crispy texture. While it won’t be as crunchy as deep-fried walleye, a well-seasoned breadcrumb coating and high oven heat can create a delicious alternative.
How to Bake Walleye for a Crispy Finish:
- Preheat your oven to 425°F (218°C) for best crispiness.
- Line a baking sheet with parchment paper and lightly grease it with oil or cooking spray.
- Coat walleye fillets in seasoned Panko breadcrumbs, cornmeal, or crushed crackers for crunch.
- Lightly spray the coated fillets with cooking spray to enhance crispiness.
- Bake for 15–18 minutes, flipping halfway, until golden brown and flaky.
- Broil for the last 1–2 minutes to add extra crispiness.
✅ Pros:
- Lower in fat than frying.
- No mess from hot oil.
- Still delivers a satisfying crunch when done right.
❌ Cons:
- Not as crispy as deep-frying.
- Takes longer than pan or deep-frying.
2. Air-Fried Walleye – The Best of Both Worlds
Air-frying is an excellent alternative if you want the crunch of fried walleye without all the oil. It uses hot air circulation to crisp up the breading while keeping the fish moist inside.
How to Air-Fry Walleye for a Crispy Texture:
- Preheat your air fryer to 375°F (190°C).
- Lightly coat fillets in oil or cooking spray before breading to help it stick.
- Press seasoned breadcrumbs or Panko firmly onto the fillets.
- Arrange fillets in a single layer in the air fryer basket (don’t overcrowd).
- To reheat, air-fry for 10–12 minutes, flipping halfway through, until crispy and golden.
✅ Pros:
- Uses 80% less oil than deep-frying.
- Faster cooking time than baking.
- Produces a crispy exterior and tender interior.
❌ Cons:
- May not get quite as crunchy as deep-frying.
- Cooking space is limited compared to oven baking.
How Do I Store and Reheat Leftovers?
If you have leftover fried walleye, proper storage and reheating methods can help maintain its crispiness rather than turning it soggy.
1. How to Store Leftover Walleye
For the best quality, follow these steps:
- Let the fried fillets cool completely before storing (prevents condensation and sogginess).
- Store in an airtight container with paper towels between layers to absorb moisture.
- Refrigerate for up to 2 days – Fried fish is best eaten fresh, but it can last a couple of days.
- Freeze for longer storage – If you want to keep it for a longer time, wrap individual pieces in parchment paper and store them in a freezer-safe bag for up to 3 months.
2. Best Ways to Reheat Fried Walleye
Reheating fried walleye properly is key to keeping it crispy on the outside and flaky inside.
Oven Method (Best for Maintaining Crispiness)
- Preheat oven to 375°F (190°C).
- Place the walleye on a wire rack over a baking sheet (prevents sogginess).
- Bake for 10–12 minutes, flipping once halfway.
✅ Keeps the breading crispy without drying out the fish.
Air Fryer Method (Quick & Extra Crispy)
- Preheat air fryer to 350°F (175°C).
- Arrange fillets in a single layer in the basket.
- Air-fry for 5–7 minutes, flipping halfway through.
✅ The best method for fast, crispy reheating.
Skillet Method (For Small Batches)
- You can also heat a small amount of oil in a skillet over medium heat.
- Reheat fillets for 2–3 minutes per side.
✅ Restores some crispiness but can make the fish slightly oily.
Methods to Avoid
❌ Microwave – Makes the breading soggy and the fish rubbery.
❌ Toaster Oven Without a Rack – Can result in uneven heating.
Final Thoughts
- For frying walleye, use peanut, canola, or vegetable oil for the best results.
- For a healthier alternative, try baking or air-frying—you’ll still get a crispy texture without all the oil.
- For leftovers, store properly and use the oven or air fryer to keep them crispy.
Following these tips will help you enjoy perfectly fried (or baked) walleye every time! Let me know if you’d like more details. 😊
The Ultimate Guide to Perfect Fried Walleye
Fried walleye is more than just a meal—it’s a beloved tradition, especially in the Midwest, where fish fries bring together family and friends. Whether you’re enjoying it at a lakeside gathering or making it in your kitchen, the key to the best fried walleye comes down to choosing fresh fillets, using the right breading and seasonings, and frying with high-quality oil at the right temperature.
Key Takeaways for Frying the Perfect Walleye:
✅ Mild, Sweet Flavor – Walleye’s delicate taste makes it an ideal fish for frying.
✅ Crispy Breading Perfection – Use cornmeal, Panko, or beer batter for a delicious crunch.
✅ Frying Method Matters – Deep-frying offers unbeatable crispiness, while pan-frying is a great alternative.
✅ Oil Selection is Key – Use peanut, canola, or vegetable oil for best results.
✅ Alternative Cooking Options – Baking and air-frying offer healthier, still-tasty options.
✅ Perfect Pairings – Serve with tartar sauce, coleslaw, or Midwest-style potato salad for an authentic fish fry experience.
No matter how you prepare your walleye—whether beer-battered and deep-fried, pan-fried with a golden crust, or baked for a healthier twist—you’ll end up with a flaky, tender, and flavorful dish that’s sure to impress.
If you’ve never tried making fried walleye at home, now is the perfect time! With this step-by-step guide, you have everything you need to make a restaurant-quality fish fry right in your own kitchen. Give it a try and let me know how it turns out!
What’s your favorite way to fry walleye? Drop a comment below and share your tips, experiences, or even your go-to side dishes for the ultimate fish fry! Happy cooking! 🎣🔥🍽️